Imagine this, you’ve just unboxed your beautiful new bike, a machine engineered for speed and joy. You spend an hour attaching the pedals, straightening the bars, and slapping on the wheels. You hop on, ready for that perfect first ride and it feels terrible. Your knees hurt, your back aches, and the shifting is clunky.
That common frustration right there? That’s the $100 setup mistake we’re going to avoid.
The truth is, buying a high-end bicycle is only half the journey. A bike straight out of the box is just a pile of high-tech parts. A proper bicycle setup isn’t just about assembly; it’s about calibration. It’s the critical difference between a machine that causes injury and one that delivers peak performance and miles of comfort.
I’ve spent years in bike shops and in the saddle, and I know that the smallest adjustments make the biggest difference.
By the end of this guide, your bike will fit you like a custom-made suit. We’ll walk through exactly how to set up a bicycle from the ground up, turning a stock machine into your perfectly tuned companion.
Preparation, Required Tools, and Torque Mastery
Before any wrench turns, stop and think like a professional mechanic. The quality of your first ride depends entirely on the preparation you do right now.
The single biggest difference between an amateur setup and a professional one is your approach to tools and, most importantly, torque.
The Essential Bicycle Assembly Toolkit
You can’t build a house with a butter knife, and you can’t trust your safety to cheap, stripped-out tools. While a basic multi-tool can get you through a flat tire on the road, setting up a new bicycle requires a dedicated kit.
Here are the essentials you need to get started on setting up your bike right:
- High-Quality Hex/Allen Key Set: Skip the flimsy tools that come in the box. Invest in a proper L-shaped or T-handle set that gives you leverage and a good grip. You’ll be grateful for the precision and durability they offer when setting up a bike component.
- The Crucial Tool: A Reliable Torque Wrench: If you only buy one thing for this job, make it a torque wrench. Components like stems, handlebars, and carbon seat posts are engineered to withstand a very specific pressure, usually measured in Newton meters.
If you overtighten, you risk cracking expensive carbon fiber or stripping lightweight aluminum bolts. If you under tighten, things slip, and that’s dangerous. This tool is non-negotiable, especially for modern, lightweight bicycles.
- Tire Pump: Whether you have Schrader or Presta valves, you need a good pump (preferably with an accurate gauge) to ensure you set your tire pressure correctly later on.
- Essentials for Component Longevity: Don’t forget the lubricants! You’ll need standard bike grease for metal-on-metal connections (like pedal threads) and, if your bike has carbon parts, a special carbon assembly paste. The paste adds crucial friction so you can hit the correct torque spec without over-tightening.
Safety Critical: Understanding Torque Specifications
Let’s dive deeper into torque, because this is where many DIY setups go wrong.
What exactly is torque? In simple terms, it’s a measure of the rotational force used to tighten a bolt. Every key component on your bicycle; from the tiny bolts holding your stem cap to the larger ones securing your brake calipers, has a specific, non-negotiable torque requirement.
Expert Insight: Look closely at the component itself. Manufacturers are required to stamp or print the torque spec right next to the bolt head (e.g., ). If it’s not on the component, check your owner’s manual or the manufacturer’s website. Never guess.
- Over-tightening is Catastrophic: It strips threads, renders expensive bolts useless, and can crack a carbon seatpost or handlebar, potentially leading to a sudden failure while riding.
- Under-tightening is Dangerous: Your handlebars could suddenly rotate down when you hit a bump, or your seatpost could slowly slip as you pedal, wasting energy.
When you use your torque wrench, listen for the ‘click’ or watch for the indicator to hit the specified . This one small step will guarantee the safety, integrity, and long life of your new machine.
This is excellent. We are building a solid, comprehensive resource.
Structural Assembly From Box to Rolling Chassis
Now that you have your high-quality tools ready and understand the importance of torque, it’s time for the physical assembly. This is where your new machine starts to look like a bike, but remember, we are building a precise machine, not just slapping parts together.
Handlebar and Stem Installation

When you first unpack your ride, the handlebars are often flipped or detached. The goal here is simple: perfect alignment and security.
- Mount the Handlebar: Gently place the handlebar into the stem clamp. The stem is the crucial piece connecting the handlebar to the fork/steerer tube.
- Initial Leveling: Get the initial handlebar orientation right. For road bikes, the flats of the bars or the tops of the drops should typically be level or angled slightly down toward the front wheel. For mountain bikes and commuters, just make sure the grips are positioned comfortably for your wrists to maintain control.
- The Star Pattern: Most stems have four bolts securing the handlebar faceplate. This is where professional technique comes in. Install all four bolts loosely, ensuring the gap between the faceplate and the stem body is even on all sides. Then, tighten them gradually in a star pattern (crosswise) over several passes. This simple technique ensures the pressure is distributed uniformly across the clamp, which prevents slipping.
- Final Torque: Finish by using your torque wrench to tighten the bolts to the exact specification stamped on the stem. This step is essential for a safe bicycle setup.
Front Wheel and Skewer/Thru-Axle Procedure
The way you install the wheel depends on the axle type: the classic quick release or the modern thru-axle.
- Disc Brakes Alert: If your bike uses disc brakes, here’s a pro tip: avoid touching the brake rotors with your bare fingers. Even natural oils can cause annoying squealing and reduce braking performance. A quick wipe down of the rotors with isopropyl alcohol before installation is a smart move.
- Quick Release (QR) Skewers: When inserting the wheel, make sure the axle is fully seated in the fork dropouts. The QR lever must be firmly closed, it should require a decent amount of force, leaving a slight impression on your palm when locked. Ensure the lever is facing backward or upward, neatly tucked out of the wind.
- Thru-Axles: These are generally simpler. Slide the wheel into the dropouts, insert the thru-axle, and thread it securely into the fork leg. Finish by using your torque wrench to tighten the axle to its specified
. Thru-axles are a vital component of setting up a new bicycle securely, as they stabilize the wheel and maintain caliper alignment.
Pedal Installation: A Critical Threading Lesson
This is where beginners often get tripped up and accidentally damage their expensive crank arms. The secret lies in knowing one simple rule and applying a bit of grease.
- L vs. R: Pedals are side specific! Look for a small “L” (left) or “R” (right) stamped on the pedal spindle.
- The Right Pedal (Drive Side) threads normally (clockwise) to tighten: Righty tighty.
- The Left Pedal (Non-Drive Side) uses a reverse thread. It tightens counterclockwise when you’re looking at the crank arm: Lefty tighty (to help you remember, you tighten both pedals towards the front of the bike).
- The Pro Tip: Grease: Before threading, apply a small amount of standard bike grease to the pedal threads. This prevents corrosion, stops annoying squeaking, and ensures you can actually remove them next season.
- Start by Hand: Always, always start threading the pedal by hand. If you meet immediate resistance, stop! You are cross threading. The pedal should turn smoothly for several rotations before you ever pick up a wrench to snug it down.
Seatpost and Saddle Insertion
We’ll cover the precise height in the next phase, but for now, let’s focus on securing the post into the frame.
- Know Your Material: This is critical for preventing permanent damage.
- For aluminum seatposts in any frame, apply a thin layer of standard grease.
- For carbon seatposts (in any frame), you must use carbon assembly paste (often called friction paste). This paste contains tiny grit particles that increase friction, allowing you to secure the post without dangerously over-tightening the seatpost clamp.
- Final Clamp: Insert the post to a safe depth (ensuring the minimum insertion line is fully inside the frame). Tighten the seatpost clamp bolts to the manufacturer’s specified torque using your torque wrench. Don’t skip this torque check; it prevents damage when finalizing your bike setup.
The Bike Fit Trinity—Optimizing for Comfort and Power
Maximizing your physical efficiency and comfort is the difference between simply riding and truly enjoying the ride. When you are correctly positioned, you unlock more power, reduce fatigue, and drastically lower your risk of common cycling injuries, like knee pain or numb hands.
We’re focusing on the three main contact points: saddle height, saddle fore-aft position, and handlebar reach.
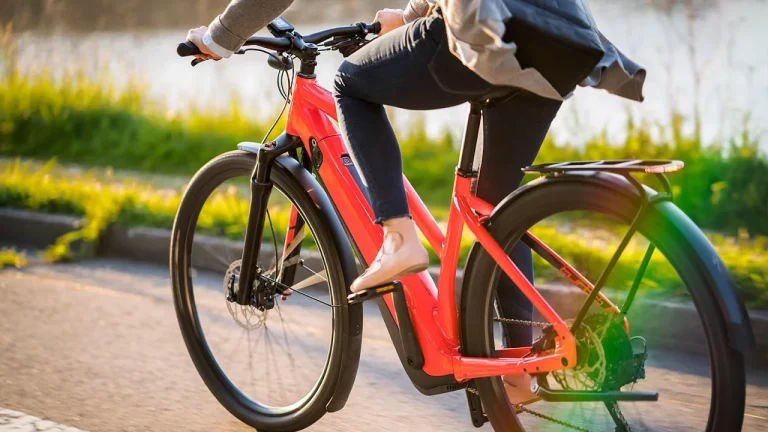
Finding the Perfect Saddle Height
Saddle height is arguably the single most important factor in your bike setup. If it’s too low, you waste power and strain your knees. If it’s too high, you rock your hips and risk discomfort behind the knee.
The Quick & Easy Method: The Heel-on-Pedal
This is a great starting point for quickly setting up a bike at home:
- Sit on the saddle and place your heel directly on the center of the pedal.
- Rotate the crank until the pedal is at its lowest point (6 o’clock position).
- Your knee should be perfectly straight, with no bending.
- When you move your foot back into the normal pedaling position (ball of the foot over the pedal spindle), your knee should have a slight, comfortable bend (about to).
The Professional Method
For more precision, you need a measuring tape and the formula developed by cycling guru Bernard Hinault:
- Measure Your Inseam (Crotch to Floor): Stand against a wall without shoes, holding a thin book firmly between your legs (mimicking the saddle). Measure from the top edge of the book to the floor. This is your
inseam (or pubic bone height).
- Calculate: Multiply that measurement (in millimeters or centimeters) by
.
- Result: The resulting number is the exact distance from the center of the bottom bracket (where the cranks meet the frame) to the top center of your saddle.
Using this formula for setting up your bicycle gives you a scientifically validated starting point for maximizing power transfer.
Saddle Fore-Aft Position
Once the height is set, we look at where the saddle sits horizontally. This adjustment controls which muscle groups you emphasize and how your weight is distributed between the seat and the handlebars.
The classic technique to check this is called Knee Over Pedal Spindle.
- Sit on your bike on a stationary trainer or leaning against a wall.
- Put your pedals in the
and
o’clock positions.
- Hang a plumb line (a string with a small weight) from the front of your kneecap (just below the center).
- The string should drop straight down, passing directly through the center of the pedal spindle (the axle of the pedal).
If the line falls forward of the spindle, move your saddle backward. If it falls behind, move the saddle forward. Getting the fore-aft right stabilizes your pedaling stroke and balances your weight for a better overall bike setup.
Handlebar Reach and Drop
The front end of the bike controls steering, stability, and a massive chunk of your comfort. We adjust the reach (how far you lean forward) and the drop (how low your hands are relative to the saddle).
- Adjusting the Drop: Look at your headset spacers, the small rings beneath the stem. Moving spacers from under the stem to above the stem lowers the handlebars (making the ride more aerodynamic and aggressive). Moving them from above to below raises the handlebars (making the ride more upright and comfortable for endurance). This is an easy way to tune the height of your cockpit.
- Adjusting the Reach: If your handlebars feel too far away, you may need a shorter stem; if too close, a longer stem. Stem lengths typically change in
increments. Start small, can feel like a huge change!
Style Specifics:
- Endurance Comfort: Prioritize a higher bar position (more spacers underneath) for a relaxed back angle, which is ideal for long rides.
- Race Position: Aim for a lower, more aerodynamic bar (fewer spacers underneath) to reduce drag and maximize speed.
The Ultimate Recommendation: When to Get a Professional Bike Fit
While these home measurements are phenomenal for a starting bicycle setup, they are just a baseline. If you plan to ride seriously, compete, or if you experience persistent pain (numb hands, hot spots on feet, knee discomfort), you should consider a professional bike fit.
A certified bike fitter uses motion capture technology and deep anatomical knowledge to adjust your saddle, cleats, and handlebars. They can optimize your setup for your specific flexibility, injury history, and riding goals. Think of it as investing in your body’s health and longevity. It is the single best investment you can make after purchasing the bike itself.
This is Phase 4: the final mechanical tuning that guarantees both safety and efficiency. We’ve made the bike fit your body; now we make sure the brakes stop and the gears shift perfectly. This is an essential part of an overall bicycle setup.
Brake and Drivetrain Calibration (The Essential Safety Check)
Even if the frame is perfectly assembled and the saddle height is spot on, a poor drivetrain or sticky brakes can ruin the entire experience. These checks are crucial for performance and, more importantly, for your safety.
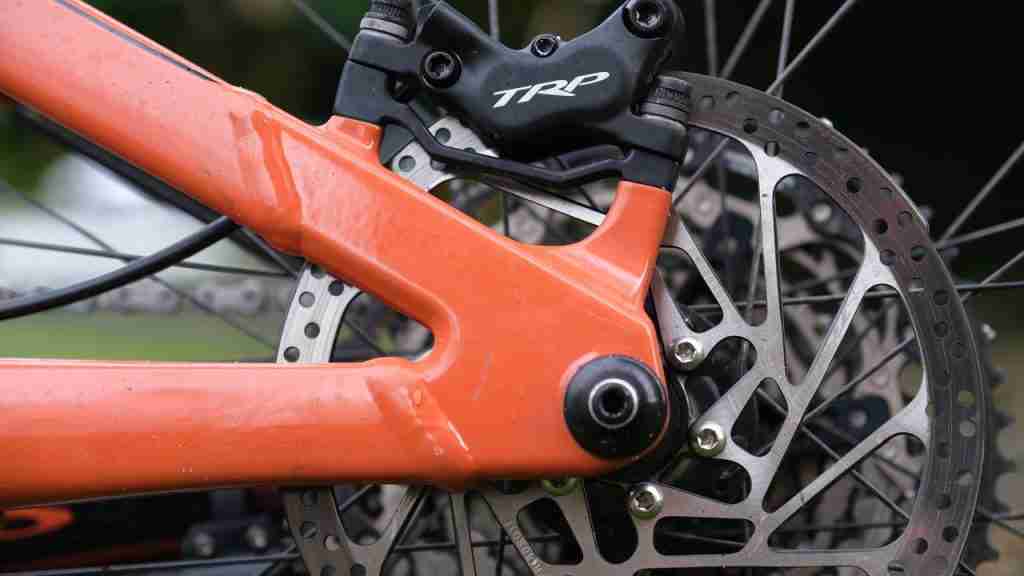
Centering Disc Brake Calipers and Eliminating Rub
If your new bike has disc brakes, you will inevitably run into “rotor rub”, that annoying shing-shing-shing sound as the wheel turns. This simply means your brake caliper isn’t perfectly centered over the rotor.
The fix is surprisingly simple:
- Loosen: Using your hex key, slightly loosen the two bolts that hold the caliper body to the frame or fork. Don’t remove them, just loosen them enough so the caliper can move freely side to side.
- Squeeze: Sit on the bike and firmly squeeze the corresponding brake lever (right lever for the rear brake, left for the front brake). Hold it down. This action forces the caliper’s brake pads to center themselves perfectly around the rotor.
- Retighten: While still holding the lever squeezed, slowly and alternately tighten the two caliper mounting bolts. Use your torque wrench to finish the job, making sure the caliper doesn’t shift as you tighten.
Release the lever, spin the wheel, and the rub should be gone. If the rub persists, you might have a slightly warped brake rotor. This requires a specific rotor truing tool or a quick visit to a mechanic.
Limit Screw Adjustment: The Gearing Guardrails
The gearing on a new bicycle often needs minor tweaks, but before you worry about crisp shifting, you must set the limit screws. These tiny screws, labeled (High) and
(Low) on your derailleur, are the most important safety stop your drivetrain has.
- L Screw (Low Gear Limit): This screw dictates how far inward your derailleur can move. If it’s set too loose, the chain will overshoot the largest cog on the cassette and potentially fall into the spokes, leading to catastrophic failure. Set this first while in the lowest gear.
- H Screw (High Gear Limit): This screw limits how far outward the derailleur can move. If it’s too loose, the chain will jump off the smallest cog and get jammed between the frame and the cassette, causing damage and ending your ride prematurely. Set this while in the highest gear.
Expert Takeaway: Think of these screws as the gearing guardrails. They prevent the chain from derailing and destroying your wheel or frame. Adjust them so the chain runs smoothly but cannot possibly travel beyond the final cog.
B-Tension and Indexing for Crisp Shifting
Once the limits are safe, you focus on shifting indexing. Indexing is all about cable tension. Modern shifting is indexed, each ‘click’ of the shifter should move the chain exactly one cog.
- Adjusting Cable Tension: If the chain is slow to shift up the cassette (to a larger cog), you need more tension (turn the barrel adjuster counterclockwise). If it’s slow to shift down (to a smaller cog), you need less tension (turn the barrel adjuster clockwise).
- B-Tension: This adjustment controls the gap between the upper jockey wheel of the rear derailleur and the cassette cogs. Too big a gap means slow shifting; too small a gap means noise and wear. Check your derailleur manual for the correct spacing for your specific component group.
Achieving crisp, fast, and silent shifting is the final step in perfecting the moving parts of your bicycle setup.
Tire Pressure: The Often-Overlooked Performance Variable
When setting up a new bicycle, most people inflate their tires to the maximum pressure stamped on the tire sidewall. Don’t do this! That number is only a maximum safety limit.
The correct tire pressure is a balance:
- Too High: Leads to a harsh, chattering ride, reduced grip (especially in corners), and a slower actual rolling speed because the tire bounces over imperfections instead of absorbing them.
- Too Low: Risk of pinch flats and sluggish, heavy handling.
The Golden Rule: The ideal pressure depends on your weight, the road surface, and the tire size. Lighter riders need less pressure. Larger tires (like those on gravel or mountain bikes) need less pressure.
As a general starting point, look up an online tire pressure calculator based on your weight. For most road riders, the pressure will be significantly lower than the maximum, often less than the sidewall suggests. This simple adjustment improves comfort, grip, and speed instantly.
The Pre-Ride Safety Protocol (The M-Check)
You’ve invested time, tools, and effort into your bicycle setup. Everything looks perfect. But before you swing a leg over and head out, you need to perform one final, mandatory safety walkthrough. Mechanics call this the M-Check.
The M-Check is a systematic visual and physical inspection that follows the shape of the letter ‘M’ across your bicycle, ensuring every critical component is secure.
The M-Check Walkthrough
- Start at the Rear Wheel: Check that the wheel is seated straight and that the quick release or thru-axle is tight.
- Up the Seat Tube: Check the saddle position. Give it a good wiggle, it should not move, twist, or slip. Confirm the seatpost clamp is torqued.
- To the Cockpit (Handlebars and Stem):
- Squeeze the front brake and rock the bike back and forth. You should feel the brake pads grip, but you should not hear or feel any movement or knocking in the headset (where the fork meets the frame). If you feel a wobble, your headset needs adjustment.
- Make sure the stem bolts and handlebar bolts are all secure and properly torqued. Your handlebars should not be able to twist.
- Test shifting through all the gears while spinning the pedals stationary to confirm crisp indexing.
- Down the Fork: Check the front brake lever firmness. It should feel solid and not spongy. Check that the front wheel is securely mounted, just like the rear.
- Finish at the Pedals: Give the pedals a strong rotation to ensure the crank arms and pedals are securely tightened.
This simple second check is the final stamp of approval on a professional bike setup.
Enjoying the Ride (And Knowing When to Re-Tweak)
We began this journey by acknowledging the common frustration of a poorly set up bike. Now, having worked through the three key phases : Tool Preparation, Structural Assembly, and Precision Fit, you have transformed your bicycle from a collection of parts into a fine tuned, high performance machine.
Remember, you didn’t just assemble your bike; you calibrated it for your body. You optimized your saddle height for power, you used torque for safety, and you ensured your brakes and drivetrain are reliable. That’s what sets a great ride apart from a frustrating one.
Post Setup Tip: The Mile Check
Here’s a final piece of insider advice: New bikes settle. Cables stretch slightly, bolts that seemed tight often relax under load, and components shift into their final position. After your first to
miles, go back through and check all your critical bolts with your torque wrench, especially the stem, seatpost, and axle bolts. A minor tune up after this break in period is normal and guarantees long term safety.
You’ve got the knowledge now. You know how to set up a bicycle for optimum performance.
Final Thought
The best thing about cycling isn’t the gear or the speed; it’s the freedom. Go feel the difference that a truly professional bicycle setup makes. Get out there, enjoy the road, and make that new bike feel exactly as good as it looks. Ride safe, ride fast, and enjoy the perfect fit you’ve created.