Imagine yourself gliding down a bustling street, sun warming your face as the wind whips through your hair. Suddenly, a turn becomes necessary, but without warning, you brake hard, inches from a confused driver. What caused this close call? You guessed it – missing hand signals.
Did you know? A recent study by the National Highway Traffic Safety Administration (NHTSA) revealed that nearly half of all bike accidents could be prevented with proper use of hand signals. These seemingly basic gestures pack a powerful punch when it comes to your safety on the road.
This guide will equip you with the essential knowledge of bike safety hand signals including the basic hand signals to use without falling. We’ll transform you from a silent cyclist to a confident communicator, navigating traffic with ease and ensuring a smooth, enjoyable ride. Buckle up, and let’s get signals for bike riding!
Why Are Bike Hand Signals Important?
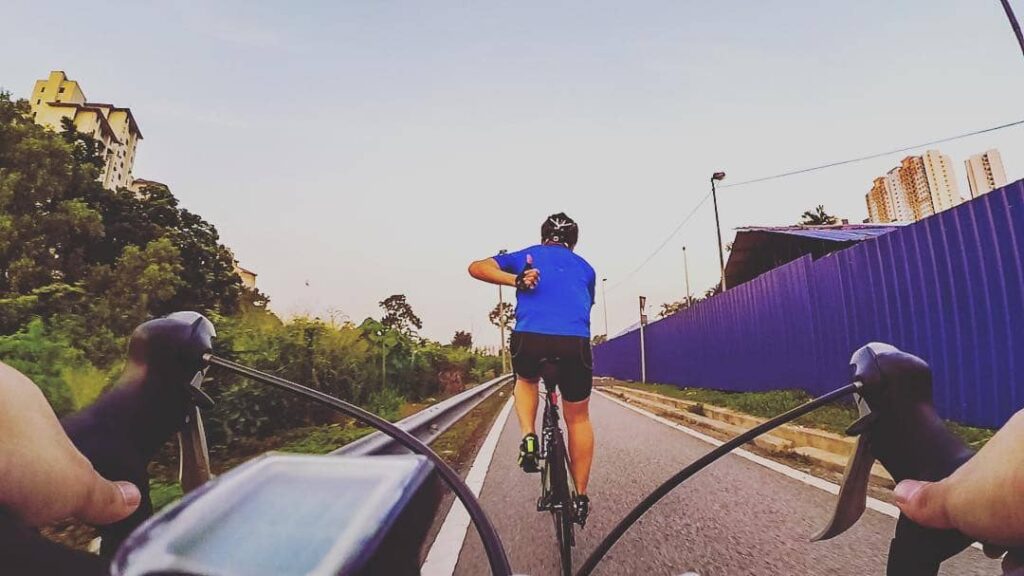
Imagine weaving through traffic on your bike, feeling like an invisible ghost. Yikes! Without hand signals, that’s exactly what you become to drivers and pedestrians. But fear not, fellow cyclist! Here’s why mastering those simple hand gestures is your key to staying safe and seen:
1. Crash Avoider:
Ever felt a car almost clip you because they didn’t know where you were going? Hand signals are like your mini-megaphone, clearly shouting your intentions (“Left turn incoming!”) and preventing nasty surprises that lead to accidents.
2. Predictable Pro:
Imagine driving blindfolded – scary, right? That’s how drivers feel when they can’t guess your next move. By flashing your hand signals early, you’re like a flashing neon sign, letting them know exactly what you’re planning (“Turning right, watch out!”). This helps them react smoothly, keeping you both safe.
3. Respect Booster:
Sharing the road isn’t just about rules, it’s about courtesy. When you use hand signals, you’re basically saying, “Hey, I see you and respect your space!” This builds trust and understanding between everyone, making the road a happier place for all.
So, ditch the invisible act and become a confident communicator with hand signals. Remember, they’re not just fancy waves, they’re your safety superpowers!
The Basic Bike Hand Signals That You Need To Know

Now that you understand the superpowers of cyclists hand signals, let’s dive into the specifics! Remember, clarity is key, so practice these moves until they become second nature.
1. Left Turn
Action: Extend your left arm straight out to your side, palm facing forward, like you’re offering a high five to the sky. Think of yourself saying, “Left turn coming up!”
Pro Tip: Start signaling early and hold it steady until you complete the turn. This gives drivers ample time to react.
2. Right Turn
Action: Extend your right arm straight out to your side, elbow bent at a 90-degree angle, with your hand pointing down. Think of it as a giant question mark asking, “Turning right, okay?”
Emphasis: Make sure your arm is fully extended for maximum visibility. Don’t let your backpack or jacket hide your signal.
Pro Tip: Look over your right shoulder before turning (shoulder check!), even if you’ve signaled. This double-check ensures no surprises and keeps everyone safe.
3. Slowing Down
Action: There are two main options:
- Option 1: Extend your left arm downwards, palm open and facing backward, like you’re pushing something away. Imagine saying, “Watch out, slowing down!”
- Option 2: Use the “brake check” technique. Briefly squeeze your brake levers, causing your brake lights to flash. This is especially helpful in low-light conditions.
Body Language: Combine the hand signal with a slight head nod and reduced pedaling speed. Together, they paint a clear picture of your intention to slow down.
Pro Tip: Start slowing down early and signal continuously until you come to a complete stop.
4. Stopping
Complete Stop:
- Action: Use the same left arm downward signal as slowing down, but hold it firmly until you’ve stopped completely. Think of it as a big, red STOP sign for everyone behind you.
Momentary Stop:
- Action: Briefly extend your left arm downward as described above, then retract it once you’ve paused momentarily. This tells others you’re stopping briefly, but not completely.
Pro Tip: If you’re unsure whether to use a complete or momentary stop signal, err on the side of caution and go for the complete stop signal. It’s always better to be overly cautious than cause confusion.
5. Lane Change/Merge:
Action: Combine the following:
- Hand Signal: Use the appropriate signal for your intended direction (left or right turn).
- Shoulder Check: Look over the shoulder corresponding to the direction you’re merging into.
Emphasis: Both the hand signal and shoulder check are crucial. The signal tells others your intent, while the shoulder check ensures no blind spots and potential collisions.
Pro Tip: Don’t rush your merges. Signal early, check your shoulder thoroughly, and merge slowly and smoothly.
6. Yield/Giving Way
Action: Extend your right arm straight out to your side, palm open and facing forward, similar to a right turn signal, but keep your arm lower (around elbow level). This signals, “I’m yielding, please go ahead.”
Visual Contact: Make eye contact with the driver you’re yielding to whenever possible. This personalizes the interaction and ensures they see your signal.
Pro Tip: Be assertive but courteous when yielding. Don’t wait forever, but clearly communicate your intention to let them pass.
| Hand Signal | Gesture | Meaning |
|---|---|---|
| Left Turn | Extend left arm straight out | Signaling a left turn ahead |
| Right Turn | Extend right arm straight out | Indicating a right turn upcoming |
| Slowing Down | Lower left arm, bent at the elbow | Alerting others about slowing down |
| Stop | Left hand down, palm facing back | Signifying a complete stop |
| Give Way | Pointing down with left arm | Yielding to others, allowing them to pass |
Remember, practice makes perfect! Find a safe, traffic-free space to rehearse these signals until they become natural and ingrained in your cycling routine.
By mastering these basic hand signals for biking, you’ll not only enhance your safety but also contribute to a smoother, more respectful flow of traffic for everyone on the road.
Beyond the Basics: Advanced Hand Signals for Savvy Cyclists:
Conquered the essential hand signals? Ready to level up your communication game on the road? Buckle up, because we’re diving into the realm of advanced maneuvers!
Hand Signals for Complex Maneuvers:
U-turn:
Feeling adventurous and needing to whip a 180? No problem! Here’s your signal:
- Step 1: Extend your right arm out straight, like a regular right turn. This tells everyone you’re slowing down and changing direction.
- Step 2: As you loop around, switch your arm to a left turn signal. Now everyone knows you’re completing the U-turn.
Roundabout Navigation:
Navigating those circular traffic wonders can be tricky. Here’s how to signal your way through:
- Before entering: Use the right turn signal to indicate you’re joining the roundabout.
- Inside the roundabout: Maintain the right turn signal if you’re planning to exit at the next available exit.
- Exiting: Switch to the left turn signal well before your chosen exit to inform others of your intention.
Remember: Always shoulder check before making any complex maneuvers, even when signaling clearly.
Bonus: Feeling fancy? Use a circular motion with your hand while maintaining the right turn signal for a clear “I’m staying in the roundabout” message.
Non-Verbal Communication Cues: Beyond Hand Signals
While hand signals are the foundation of cyclist communication, they’re not the whole story. Mastering non-verbal cues like body language, eye contact, and facial expressions can further elevate your on-road communication and awareness.
Body Language:
- Posture: Sit upright and confident, indicating awareness and control. Avoid slouching, which can project uncertainty.
- Head nods: Use subtle head nods to acknowledge other road users, especially when yielding or thanking them.
- Pointing: Avoid accusatory pointing, but a gentle point directed at a hazard (pothole, debris) can alert other cyclists.
Eye Contact:
- Make eye contact with drivers at intersections: This establishes connection and ensures they see you.
- Scan your surroundings: Maintain awareness of other road users through peripheral vision and occasional glances.
- Avoid staring: This can be misread as aggression or confusion.
Facial Expressions:
- Smile: A friendly smile can go a long way in promoting courtesy and cooperation on the road.
- Maintain a neutral expression: Avoid grimaces or scowls, which can create unnecessary tension.
- Use facial expressions cautiously: Remember, your helmet might obscure some expressions, so rely more on body language and eye contact.
Remember: Non-verbal cues are powerful, but always prioritize clear and consistent hand signals for unambiguous communication. By combining both, you become a truly savvy and communicative cyclist, enhancing your safety and fostering a more positive atmosphere on the road
Group Riding Signals: Staying Connected on the Move
Cycling in a group is exhilarating, but it also introduces a new layer of communication complexity. Thankfully, specific hand signals can keep your pack moving smoothly and safely.
Maintaining Formation:
- Pointing Forward: Extend your left arm straight with your index finger pointing forward. This signals to the riders behind you to maintain the current formation.
- Slowing Down: Use the standard slowing down signal (left arm down, palm open) clearly and early to give everyone ample time to react.
- Stopping: Extend your left arm down firmly and hold it steady until you’ve come to a complete stop. This alerts everyone behind you to do the same.
Maneuvers:
- Left Turn: Follow the usual left turn signal, but emphasize clarity and early signaling due to the increased number of riders behind you.
- Right Turn: Same as a solo right turn signal, but look over your right shoulder and ensure everyone in the group acknowledges your signal before proceeding.
- U-turn: This maneuver is generally discouraged in large groups due to safety concerns. If absolutely necessary, follow the complex maneuver U-turn signals outlined earlier, with extra emphasis on clear communication and shoulder checks.
Additional Cues:
- Tap your helmet: This signals a potential hazard or obstacle ahead. Look back to ensure everyone sees your signal.
- Waving with open palm: This generally means “all good” or “proceed” within the group. Use it cautiously to avoid confusion with standard hand signals.
- Verbal communication: While hand signals are essential, don’t underestimate the power of clear, concise verbal calls like “slowing down” or “car on right!” especially in noisy environments.
Remember: Consistency is key! Agree on a standardized set of hand signals within your group before setting off. Practice them regularly so everyone becomes familiar and comfortable using them. By mastering these communication tools, you can transform your group rides into safe, enjoyable experiences for everyone involved.
Practical Tips for Using Hand Signals
Now that you’ve got the basics down, let’s dive into some practical tips for using those hand signals like a pro:
Safe Urban Cycling Practices
In the hustle and bustle of the city, it’s crucial to be extra cautious. When navigating urban streets, use your hand signals a bit early – give folks around you a heads-up. It’s like saying, “I see you, and I’m making a move!”
Road Signaling Basics for Bicyclists
Think of hand signals as your own personal road signs. Keep them clear and visible. Don’t be shy – make those signals bold, so everyone can see your superhero moves. It’s all about creating a smooth flow on the road.
Incorporating Non-Verbal Communication on Roads
Cycling is a language, and hand signals are your words. Feel free to mix in a nod, a smile, or a wave. It’s not just about signaling; it’s about connecting with fellow cyclists and drivers.
A little non-verbal communication goes a long way in creating a friendly road atmosphere.
So, there you have it – practical tips for weaving your hand signals seamlessly into your cycling routine. Remember, it’s not just about the signals; it’s about keeping the road a happy place for everyone. Ride on, and enjoy the journey!
How to Signal on a Bike Without Falling
Alright, let’s tackle a common concern: how to throw those signals without doing a balancing act. It’s simpler than you think:
1. Practice Off the Road:
Before hitting the busy streets, find a quiet spot to practice your signals. Get comfortable with the moves without worrying about traffic. It’s like a little rehearsal for your cycling dance.
2. Keep a Steady Pace:
When it’s time to signal, maintain a steady pace. No need for sudden moves; just smoothly extend that arm to let others know your next move. It’s all about being steady and predictable.
3. Use Your Peripheral Vision:
Ever heard of keeping an eye on the prize? Well, in this case, it’s keeping an eye on the road. Use your peripheral vision to stay aware of your surroundings while throwing out those signals.
4. Master One-Hand Riding:
Practice riding with one hand on the handlebars. It might feel a bit wobbly at first, but mastering one-hand riding makes signaling a breeze. Just take it slow, and you’ll get the hang of it.
5. Signal Early and Clearly:
Don’t be shy with your signals. Whether it’s a turn or a stop, make your moves early and crystal clear. It’s like saying, “I’m here, and here’s where I’m going.”
There you go – a simple guide to signaling without the fear of taking a spill. With a bit of practice, you’ll be signaling like a pro in no time.
How Hand Signals Keep You Safe: Riding with Confidence & Clarity
Imagine cruising down the street, feeling the wind in your hair and the sun on your face. Suddenly, you need to turn, but without warning, you brake hard, inches from a confused driver. What could have prevented this near miss? Clear and consistent hand signals.
More than just polite gestures, hand signals are your superpower of safety on the road. They’re the language that keeps you visible, predictable, and ultimately, out of harm’s way. Let’s delve into how these simple actions have a major impact on your cycling experience:
Avoid Collisions: Communicating Clear Intentions
Think of hand signals as your flashing neon sign, broadcasting your every move to drivers and pedestrians. Signaling your turns, stops, and lane changes early and clearly reduces confusion and misinterpretations, preventing potentially disastrous collisions. It’s like saying, “Hey there, I’m planning to turn left, so please watch out!” before you make your move.
Increase Driver Awareness: Be Seen, Be Heard (Without Shouting)
Sharing the road involves understanding driver expectations. By consistently using hand signals, you become a predictable element in their field of vision.
This allows them to anticipate your movements and react accordingly, giving you the space and respect you deserve. It’s like saying, “Look, I’m here, and I’m following the rules!” loud and clear, without having to raise your voice.
Build Confidence: Owning the Road with Ease
Knowing and using hand signals effortlessly translates into increased confidence on the road. You navigate intersections and traffic situations with clarity and purpose, feeling empowered and in control.
This confidence shines through to other road users, fostering a more positive and cooperative atmosphere for everyone. Imagine riding smoothly and confidently, knowing you’re communicating effectively and ensuring your own safety.
Promote Cycling Advocacy: Leading by Example
Beyond your personal safety, using hand signals actively promotes safer cycling practices for everyone. You become a visible ambassador for responsible cycling, demonstrating the importance of clear communication and encouraging others to follow suit. It’s like setting a positive example that says, “Hey, cycling can be safe and enjoyable for everyone if we all work together!”
Remember:
Mastering hand signals is a journey, not a destination. Practice makes perfect, so find a safe space and rehearse these moves until they become second nature.
By incorporating them into your routine, you’re not just protecting yourself, you’re contributing to a safer and more enjoyable cycling experience for everyone on the road.
So, raise your hand high (with the appropriate signal, of course!) and ride with confidence, knowing you’ve unlocked the true power of communication on two wheels.
What Happens When You Skip the Signals: The Price of Silence on the Road
While hand signals might seem like minor details, neglecting them can have significant consequences, impacting your safety, wallet, and overall cycling experience.
So, before you decide to ride in silent mode, consider the following:
Potential Legal Consequences: Not Worth the Gamble
While specific laws regarding hand signals vary by region, many areas have regulations requiring cyclists to signal their intentions. Skipping these signals can land you with a fine or ticket, adding an unwelcome expense to your ride.
In some cases, ignoring hand signals could even be considered contributory negligence in an accident, impacting your ability to seek compensation for damages.
Remember, ignorance of the law is no excuse, so invest in your knowledge and avoid unnecessary legal hassles.
Increased Risk of Accidents: Silence Equals Danger
The most concerning consequence of skipping hand signals is the increased risk of accidents. Without clear communication, you become an unpredictable element on the road, confusing drivers and pedestrians who rely on your signals to anticipate your movements.
This lack of understanding can lead to near misses, collisions, and even serious injuries. Remember, your safety is paramount, and hand signals are your essential tools for staying visible and protected.
Frustration for Other Road Users: Sharing the Road Means Sharing Responsibility
The road is a shared space, and neglecting hand signals disrupts the flow of traffic, creating frustration and tension for everyone involved. Imagine driving down the street, trying to guess a cyclist’s next move with no signals?
It’s not only stressful, but it can also lead to aggressive behavior and negative interactions. By using hand signals, you’re not just ensuring your safety, you’re promoting courtesy and cooperation, making the road a more pleasant and respectful experience for all.
Remember, skipping hand signals is like riding with a blindfold on. You might think you’re saving time, but you’re putting yourself and others at risk.
Embrace these simple communication tools, not just for your own safety, but to contribute to a safer and more enjoyable cycling experience for everyone. By choosing clarity over silence, you’re sending a message that says, “I see you, I respect you, and we can share the road safely together.”
FAQs
Why should I use hand signals while cycling?
Hand signals enhance communication on the road, making your intentions clear to fellow cyclists and drivers, ultimately fostering a safer cycling environment.
Can I use verbal signals instead of hand signals?
While verbal signals can be helpful, hand signals are universally understood and provide a visual cue, reducing the risk of miscommunication.
What if I forget a specific hand signal?
Practice makes perfect. Take some time in a safe area to rehearse the signals until they become second nature, minimizing the chances of forgetting.
Are hand signals legally required when cycling?
Laws vary, but many places mandate the use of hand signals. Regardless of legal requirements, using them is a vital safety practice.
How early should I give a hand signal before making a turn?
Aim to signal at least 100 feet before turning, giving those around you ample time to react and creating a smoother flow of traffic.
Conclusion
So, there you have it – the lowdown on bike hand signals. It’s not just about waving your hands around; it’s about creating a safer and friendlier road for everyone.
Remember, these signals aren’t a secret club handshake; they’re your way of communicating with fellow cyclists and drivers. It’s like having a conversation without saying a word.
When you throw up that left turn signal, you’re saying, “I’m turning left, heads up!” It’s a simple gesture that goes a long way in preventing confusion and surprises on the road.
Skipping hand signals might seem like a small thing, but it can lead to confusion, frustration, and missed connections on the road. Safety takes a hit, and the road becomes a less enjoyable place for everyone.
So, let’s keep the road dance alive – signal your moves, stay predictable, and enjoy a smoother, safer journey on your bike. Happy cycling!
