Remember that feeling? That itch for something new, a desire to get fitter, stronger, and more energized? Maybe you’ve seen friends transform their bodies, heard whispers about amazing cycling classes, or perhaps the weather outside just isn’t cooperating with your outdoor exercise plans. Whatever sparked that initial thought, you’ve landed in the right place at the perfect time. Welcome to the incredibly rewarding world of indoor cycling.
Forget those intimidating images of super athletes in tiny outfits. Indoor cycling is for everyone, especially if you are just starting your fitness journey. It is a fantastic way to build serious fitness, boost your mood, and discover a whole new level of personal strength. The best part? You can do it all from the comfort and safety of your own home, or in a vibrant studio, free from traffic worries, bad weather, or uneven roads. Think of it as your personal express lane to better health.
In this comprehensive guide, we are going to pull back the curtain on everything you need to know about indoor cycling workouts for beginners. We will walk you through the essential setup steps that will keep you comfortable and injury free. We will break down confusing terms into simple, understandable language. Most importantly, we will give you a clear, actionable, four week progressive plan designed specifically for you. This plan will build your core endurance, boost your confidence, and guarantee results you can feel and see. Get ready to transform your fitness journey, one pedal stroke at a time. The beginner’s advantage in indoor cycling is real, offering immediate, measurable feedback that outdoor riding sometimes cannot provide.
The Non Negotiables – Setup, Safety, and Comfort
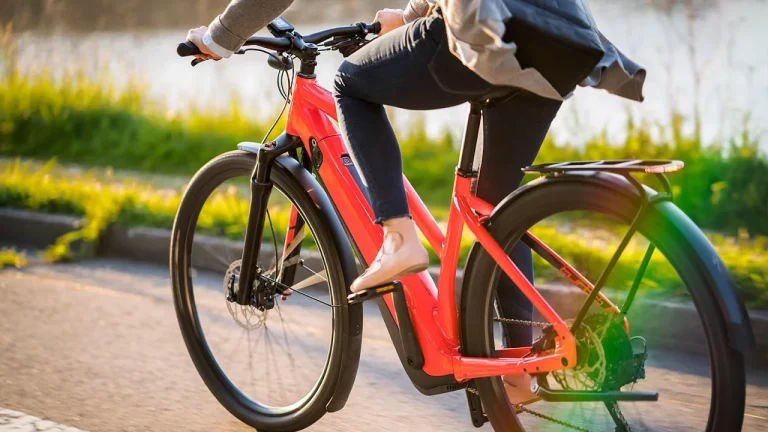
Starting any new exercise routine comes with questions. When it comes to indoor cycling, your biggest initial hurdles are often about feeling comfortable and preventing any aches or pains. Getting your bike set up correctly is not just about avoiding discomfort; it is about maximizing your workout efficiency and ensuring long term enjoyment. Think of this section as your foundation for successful indoor cycling workouts for beginners. Skipping these crucial steps is like trying to build a house without a proper base.
Dialing In Your Bike Fit: Preventing Pain and Injury
Imagine trying to drive a car with the seat too far back or too close to the steering wheel. It would feel awkward, right? The same goes for your indoor cycling bike. A proper bike fit is paramount, especially for beginners. It prevents common cycling related pains in your knees, back, and neck. Let us break down the key adjustments.
Saddle Height (The Knee Saver)
This is arguably the most critical adjustment you will make. An incorrect saddle height can lead to knee pain, which is one of the most common complaints among new cyclists. We want to avoid that!
The Hip Bone Rule (Baseline): Stand next to your bike. The top of your saddle should be roughly level with your hip bone. This provides a great starting point.
The 25 35 Degree Knee Bend (Final Check): Sit on your bike with one pedal at its lowest point (6 o’clock position). Your leg should have a slight bend in the knee, around 25 to 35 degrees. You should not be reaching with your toes to touch the pedal, nor should your knee be excessively bent. If your leg is completely straight, your saddle is too high. If your knee is very bent, your saddle is too low. Adjust in small increments, test it out, and fine tune until it feels right. A proper saddle height ensures you use your leg muscles effectively without straining your joints. This attention to detail is vital for successful indoor cycling workouts for beginners.
Handlebar Placement (The Back Relief)
Your handlebars play a huge role in your comfort, especially for your lower back and shoulders.
Beginner Friendly Positioning: For those new to indoor cycling, it is highly recommended to keep your handlebars at or slightly above your saddle height. This upright position takes pressure off your lower back and reduces strain on your shoulders and neck. As you gain flexibility and core strength, you might gradually lower them, but for now, prioritize comfort and good posture. A relaxed upper body is key for enjoyable indoor cycling workouts for beginners.
Cleats/Foot Placement
If your indoor cycling bike uses clip in pedals (which many do, like SPD or Delta), proper cleat placement is essential.
Ball of the Foot Over Spindle: Your cleat should be positioned so that the ball of your foot rests directly over the center of the pedal spindle (the axle that goes through the pedal). This maximizes power transfer and reduces strain on your feet and ankles.
For Cage Pedals: If your bike has toe cages with straps, make sure your foot is pushed far enough into the cage so the ball of your foot is centered, then tighten the straps firmly. This prevents your foot from slipping and ensures an efficient pedal stroke. Securing your feet properly is a small but important detail in making your indoor cycling workouts for beginners effective and safe.
Essential Gear Beyond the Bike (Winning the Heat Battle)
You might think you just need a bike and some motivation, but there are a few simple additions that will dramatically improve your indoor cycling experience. These items are not just luxuries; they are necessities for comfort, performance, and safety, especially when you are engaged in invigorating indoor cycling workouts for beginners.
The Mighty Fan: Your Best Friend
Let us be honest: indoor cycling can get sweaty. Without airflow, you will overheat quickly, feel sluggish, and cut your workout short. This is why a powerful fan is, hands down, the most important accessory you can invest in.
Strategic Placement: Position one or two powerful fans in front of you, aimed at your torso and face. This simulates the cooling effect of riding outdoors and allows your body to regulate its temperature much more effectively. Trust us, once you experience the difference a good fan makes, you will never ride without it. Staying cool allows you to push harder and enjoy your indoor cycling workouts for beginners far more.
Mat and Towel: Protecting Your Space and Yourself
Sweat happens! And a lot of it.
Exercise Mat: Place an exercise mat or a cycling specific mat under your bike. This serves several purposes: it protects your floor from sweat, helps dampen vibrations, and reduces noise. It is a small investment that saves your flooring from potential damage.
Towels: Keep at least two towels nearby. One for wiping sweat from your face and body during the ride, and another for wiping down your bike post workout. This keeps your equipment clean and hygienic.
Hydration Strategy: Fueling Your Effort
Staying hydrated is absolutely critical during indoor cycling. You are sweating a lot, and replacing those fluids is non negotiable.
Water Bottle Placement: Always have at least one large water bottle (750ml or 25oz) filled with water readily available. Many indoor bikes have bottle holders, so make use of them.
Sip Regularly: The general rule of thumb is to aim to drink one large water bottle per 45 minutes of moderate to intense indoor cycling. Do not wait until you feel thirsty; sip regularly throughout your workout. For longer or more intense sessions, you might consider an electrolyte drink to replenish salts lost through sweat. Good hydration ensures you maintain energy levels throughout your indoor cycling workouts for beginners.
Mastering the Fundamentals: Key Terms Explained
Stepping into the world of indoor cycling can sometimes feel like learning a new language. You might hear terms like RPE, cadence, zones, and resistance thrown around, and it is easy to feel a little lost. Do not worry! This section is dedicated to breaking down these essential terms into simple, easy to understand concepts. Understanding this vocabulary will not only help you follow any class or training plan, but it will also empower you to better listen to your body and make your indoor cycling workouts for beginners far more effective.
Decoding the Workouts: RPE, Cadence, and Zones
These three concepts are the pillars of structured indoor cycling. Once you grasp them, you will unlock a deeper understanding of your effort and how to get the most out of every ride.
Rate of Perceived Exertion (RPE): The Essential 1 10 Scale
Forget fancy gadgets for a moment. Your body is an incredible machine, and your RPE is how you subjectively measure how hard you are working. This is particularly valuable for indoor cycling workouts for beginners who might not yet have a heart rate monitor or power meter.
The RPE scale is a simple 1 to 10 rating:
- RPE 1 (Very, Very Easy): You are practically lying down on the couch. No effort at all.
- RPE 2 3 (Easy): Extremely light effort. You could hold a full conversation with ease. This is your warm up and cool down zone.
- RPE 4 5 (Moderately Easy/Conversational): You can still talk in full sentences, but you are aware you are exercising. This is your active recovery or very light endurance pace.
- RPE 6 7 (Moderately Hard/Tempo): You can speak, but only in short sentences. You are breathing heavier, but not gasping. This is often called your “Sweet Spot” or “Tempo” effort, great for building endurance.
- RPE 8 (Hard): You can only get out a few words at a time. You are breathing heavily and sustaining this effort feels challenging. This is for shorter, intense intervals.
- RPE 9 (Very Hard): You are struggling to speak even a single word. You are pushing your limits. These efforts are very short.
- RPE 10 (Max Effort): All out sprint. You cannot sustain this for more than a few seconds. Pure maximum effort.
How to Use It: When your workout plan says “ride at RPE 6,” you listen to your body and adjust your resistance and speed until you feel like you are at a 6 on that scale. It is a powerful tool for self regulation in your indoor cycling workouts for beginners.
Cadence (RPM): How Fast Are Your Legs Spinning?
Cadence refers to your pedal revolutions per minute (RPM). Most indoor cycling bikes will display this metric, and it is a fundamental aspect of efficient cycling. Different efforts call for different cadences.
- 90 100 RPM (Speed/Flats): This is generally considered the optimal cadence for riding on flat roads or when you want to generate speed. It feels like a quick, smooth spin. Aim for this during your lighter efforts or when you are focusing on leg speed.
- 70 85 RPM (Endurance/Rolling Hills): A slightly slower, but still smooth, cadence suitable for sustained endurance efforts or when you are riding up a moderate incline.
- 60 75 RPM (Heavy Climbs/Out of Saddle): When the resistance is high, simulating a steep climb, your cadence will naturally drop. This range is common for standing climbs or very heavy seated efforts. Going much lower than 60 RPM can be hard on your knees, so be mindful.
The Goldilocks Principle: You want a cadence that feels “just right”; not so fast that you are bouncing in the saddle (spinning out), and not so slow that you are grinding your gears and feeling excessive knee strain. Balancing cadence with resistance is key to effective indoor cycling workouts for beginners.
Understanding Resistance: Your “Gears” on an Indoor Bike
Unlike an outdoor bike with many gears, your indoor cycling bike typically has a resistance knob or lever. This controls how hard it is to pedal. Think of it as your hill simulator.
- Adding Resistance: Turning the knob clockwise (or moving the lever up) makes it harder to pedal. This simulates riding uphill or against a strong headwind.
- Removing Resistance: Turning the knob counter clockwise (or moving the lever down) makes it easier to pedal. This simulates riding downhill or on flat ground.
Matching Resistance to Cadence: This is where RPE, cadence, and resistance all come together. If you are aiming for a high cadence (90+ RPM) but feel like your legs are just spinning without any effort, you need to add resistance. If you are trying to maintain a moderate cadence (75-85 RPM) but find it incredibly difficult, you might need to reduce resistance slightly. The goal is to find that sweet spot where you can maintain your target cadence at your target RPE without feeling out of control or overly strained. Learning to adjust resistance properly is a critical skill for all indoor cycling workouts for beginners.
Your Progressive 4 Week Beginner Training Plan
Now that you are armed with the knowledge of proper setup and key terminology, it is time for the exciting part: your training plan! This four week program is specifically designed to build your cardiovascular fitness, muscular endurance, and confidence on the bike. We will focus on consistency and gradual progression, ensuring that each week challenges you just enough to get stronger without overwhelming you.
The plan below suggests three dedicated indoor cycling workouts per week, allowing for rest and recovery, which are just as important as the workouts themselves. Remember, consistency is your greatest resistance. Sticking to the plan, even on days you do not feel 100%, will yield incredible results. Embrace the journey of these indoor cycling workouts for beginners.
Week 1: Foundational 20 Minute Rides (Building Awareness)
This week is all about getting comfortable on the bike, understanding your RPE, and focusing on smooth pedaling. Do not worry about speed or power; simply focus on form and consistency. Each session includes a warm up and a cool down, which are non negotiable.
| Day | Workout Focus | Duration | RPE Target | Key Goal |
| Tuesday | Introductory Spin | 20 Minutes | RPE 4-5 | Focus on smooth, consistent pedaling (aim for 85+ RPM). Pay attention to your breath. |
| Thursday | Seated Endurance | 25 Minutes | RPE 5 | Maintain a steady effort. Practice drinking from your bottle while riding. Keep shoulders relaxed. |
| Saturday | Active Recovery/Rest | 30 Minutes | RPE 3-4 | Very light spinning. No hard efforts. Focus on feeling your leg muscles work gently. Stretch afterward. |
Important for Week 1: Before each session, spend 5 minutes doing a very light warm up (RPE 2-3) to get your muscles ready. After each session, spend 5 minutes doing a very light cool down (RPE 2-3) and then gently stretch your quads, hamstrings, and calves. These warm up and cool down periods are essential for your indoor cycling workouts for beginners.
Week 2: Introducing Short Intervals (Boosting Stamina)
This week, we will start to introduce very short bursts of higher intensity. This helps to build your cardiovascular stamina and teaches your body how to recover quickly. You will notice your overall ride duration is slightly longer.
Workout Example: The 30 Second Stamina Builder
This workout introduces short, controlled efforts followed by recovery.
- Warm up: 5 minutes at RPE 4. Slowly bring your cadence up to 85-90 RPM.
- Work Block:
- 30 seconds at RPE 7-8 (Hard Effort): Increase resistance slightly and push your legs. You should feel your heart rate rise and your breathing become heavy.
- 60 seconds at RPE 4-5 (Recovery): Reduce resistance, slow your breathing, and prepare for the next effort.
- Repeat this cycle 6 times.
- Cool down: 5 minutes at RPE 3. Gentle spinning, focusing on slowing your breath and relaxing. Stretch.
Focus for Week 2: The key this week is to increase the overall duration of your rides by about 5 to 10 minutes from Week 1. Also, try standing up out of the saddle for very brief periods (15-30 seconds) during your recovery phases if you feel comfortable. This helps engage different leg muscles and gives your glutes a break. Remember, these are indoor cycling workouts for beginners, so listen to your body and do not push too hard if it does not feel right.
Week 3: Extending the Endurance Ride & Core Integration
This week, we will focus on extending your ability to maintain a steady, moderate effort, which is fantastic for building aerobic fitness. We will also start to think more consciously about core engagement.
Workout Example: The 45 Minute Tempo Ride
This workout is about sustained effort.
- Warm up: 5 minutes at RPE 4.
- Main Set: 30 minutes straight at RPE 6 (Sweet Spot Effort): Find a resistance and cadence that allows you to maintain a steady RPE 6. You should be able to speak in short sentences, but it should feel consistently challenging. This is your “bread and butter” zone for building endurance. Try to keep your cadence around 80-90 RPM.
- Cool down: 5 minutes at RPE 3. Gentle spinning and stretching.
Focus for Week 3: This week, a primary focus is to start engaging your core. A common mistake is to “death grip” the handlebars. Instead, try to ride with a light grip, almost as if your hands are just resting on the bars. This forces your core muscles (abdominal and lower back) to stabilize your body, which is crucial for good posture and preventing back pain. Think about pulling your belly button towards your spine gently. This core awareness will greatly enhance all future indoor cycling workouts for beginners.
Week 4: The 45 Minute Endurance Challenge (Consolidating Fitness)
Congratulations, you are almost through your first month! This week consolidates all the fitness you have built. We will introduce slightly longer, structured climbing efforts to build strength and mental toughness.
Workout Example: Pyramid Climbs
This workout introduces a bit more structure and variation in resistance and effort.
- Warm up: 5 minutes at RPE 4.
- Work Block 1:
- 3 minutes at RPE 7 (Moderate Climb): Increase resistance to simulate a hill. Maintain a cadence around 65-75 RPM.
- 3 minutes at RPE 4-5 (Recovery): Reduce resistance, spin easy, catch your breath.
- Work Block 2:
- 5 minutes at RPE 7 (Longer Climb): Maintain the climbing effort. Stay focused on smooth pedaling even with high resistance.
- 5 minutes at RPE 4-5 (Recovery): Easy spinning.
- Work Block 3 (Optional if feeling strong):
- 2 minutes at RPE 8 (Hard Climb): Push hard for a shorter, intense climb.
- 2 minutes at RPE 4-5 (Recovery):
- Cool down: 5 minutes at RPE 3. Gentle spinning and thorough stretching.
Focus for Week 4: The goal this week is to complete three 45 minute rides. Pay close attention to your recovery on your rest days; this is when your body adapts and gets stronger. Feel proud of your progress and recognize the new level of fitness you have achieved through these indoor cycling workouts for beginners. You are no longer a complete novice!
Advanced Beginner Form and Mistakes to Avoid
As you move through your four week plan, you will inevitably settle into some habits. Many of these habits will be great, but some common errors can sneak into your form, leading to reduced efficiency and potential discomfort. Now that you have mastered the basics of your indoor cycling workouts for beginners, let us refine your technique and address the key mistakes that often derail progress. Becoming aware of these issues is half the battle.
5 Critical Form Mistakes That Sabotage Your Progress
Focusing on proper form ensures that you are using the right muscles and protecting your joints. This is a vital component of long term successful indoor cycling.
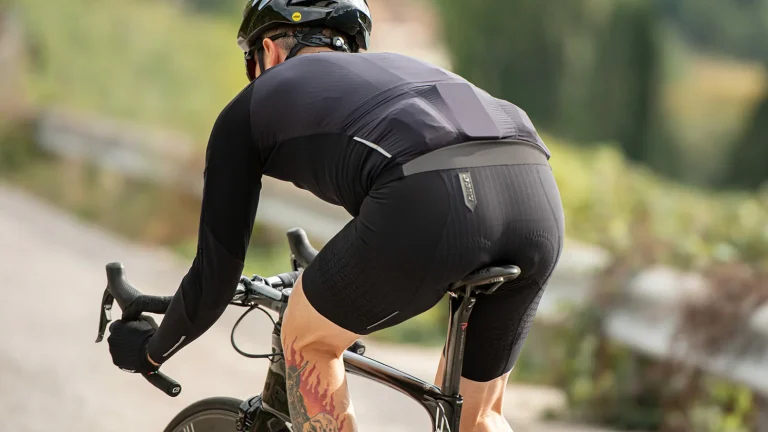
1. The Death Grip
The Mistake: This is when you white knuckle the handlebars, tensing your shoulders, neck, and arms. People often do this subconsciously when the intensity increases, especially during sprints or heavy climbs. This wastes energy and puts unnecessary strain on your upper body, leading to shoulder and neck aches.
The Fix: Think about keeping your elbows soft and slightly bent. Your hands should rest lightly on the handlebars, only there for balance and light support, not for holding yourself up. Push the work into your legs and your core. A light grip instantly encourages better posture and allows you to put more energy into your pedal stroke during your indoor cycling workouts for beginners.
2. Skipping the Pull: The Half Pedal Stroke
The Mistake: Beginners often focus only on the downward push of the pedal (from 12 o’clock to 6 o’clock). This means you only use your quadriceps and glutes, missing out on the power available from your hamstrings and hip flexors on the upstroke.
The Fix: Think of your pedal stroke not as pushing down, but as drawing a smooth, complete circle. As one leg pushes down, the other leg should be actively pulling up and sweeping through the bottom of the stroke. If you wear clip in shoes, you can truly integrate the push and pull technique. This not only engages more muscles for a full body workout but also makes your pedal stroke smoother, which is essential for efficient indoor cycling workouts for beginners.
3. The Bouncing Saddle
The Mistake: This happens when you are pedaling too fast (high cadence/RPM) without enough resistance. Your legs are moving so quickly that your hips lift and your entire body starts to bounce in the saddle. This is inefficient and can cause saddle sores and discomfort.
The Fix: If you find yourself bouncing, add resistance immediately until the bouncing stops and your hips feel stable. You should feel connected to the saddle, even at high RPMs. A high cadence requires a certain level of resistance to ensure control and power. Balance is key to effective indoor cycling workouts for beginners.
4. The Slouching Back (Neglecting the Core)
The Mistake: As fatigue sets in, especially during longer rides, many beginners allow their back to round or slouch, letting their stomach sag. This poor posture reduces breathing capacity and puts harmful pressure on your lumbar spine.
The Fix: Maintain a neutral spine. Think about gently pulling your belly button towards your spine (engaging your core) and rotating your pelvis forward slightly. Your back should be flat, not rounded. Keeping your core engaged supports your body and transfers power more effectively from your trunk to your legs. This improves performance and is a fundamental habit for all indoor cycling workouts for beginners.
5. The Cool Down Skip
The Mistake: You crushed your intervals and feel exhausted, so you immediately jump off the bike and go straight to the shower. Skipping the cool down is a missed opportunity for recovery and can lead to stiffness and dizziness.
The Fix: A proper cool down is mandatory. Spend at least five minutes spinning at a very light resistance (RPE 2-3). This allows your heart rate to gradually return to normal and helps flush metabolic waste (like lactic acid) from your muscles. Follow this immediately with static stretching (holding stretches for 30 seconds each) focused on your quads, hamstrings, and hip flexors. This helps to maintain muscle length and flexibility, reducing soreness from your challenging indoor cycling workouts for beginners.
Long Term Success – Consistency, Recovery, and Progression
You have completed your first four weeks! What comes next? The secret to long term success in any fitness routine, especially cycling, is not about brutal single efforts; it is about consistency and smart progression. Do not let your initial momentum fade. Use these strategies to keep your indoor cycling workouts for beginners fresh and challenging.
The Three Pillars of Cycling Longevity
1. Consistency Over Intensity
For long term fitness gains, cycling three times a week for 45 minutes is far better than riding once a week for two hours. Your body responds best to regular stimulus. Try to stick to your schedule and treat your cycling time like any other important appointment. Even if you only have 20 minutes, a short, focused ride is always better than skipping the workout entirely.
2. Embrace Recovery
Your muscles do not get stronger when you ride; they get stronger when you rest. During your rest days, your body repairs the micro-damage from the workout and adapts to the stress, which is what builds fitness. Ensure you are getting at least seven to nine hours of quality sleep per night. Consider active recovery days where you do something light, like walking or gentle yoga, instead of high intensity training.
3. Knowing When to Progress
Once you can easily complete the Week 4 plan, you are ready to move on! Here are simple ways to progress your indoor cycling workouts for beginners:
- Increase Duration: Add 5 to 10 minutes to your main endurance ride.
- Increase Intensity: Instead of 30 second intervals, try 45 or 60 second intervals.
- Increase Frequency: Add a fourth day of riding, perhaps a pure endurance ride or a dedicated recovery session.
- Explore Apps: Now that you have the fundamentals, consider subscribing to virtual platforms like Zwift or Peloton, which offer thousands of structured classes and virtual worlds to keep things exciting. This keeps your indoor cycling workouts for beginners fresh and engaging.
Fueling Your Rides: Hydration and Nutrition
Indoor cycling is a huge calorie burner, and you must fuel it correctly.
- Hydration During: As established, drink consistently. For any ride lasting over 60 minutes, consider adding a sports drink mix or electrolyte tablet to one of your bottles to replace sodium and potassium.
- Nutrition Before: For a ride under 60 minutes, a small, easily digestible snack 30 to 60 minutes prior is usually sufficient (e.g., a banana, a small handful of oats).
- Nutrition After: Within an hour of finishing your workout, consume a post ride snack or meal containing both carbohydrates and protein (e.g., a protein smoothie or Greek yogurt with berries). Carbs replenish your energy stores, and protein helps your muscles repair.
Your Journey is Just Beginning
If you have read this far, you are clearly committed to making indoor cycling a part of your life, and that commitment is the single most powerful tool you have.
Starting something new always feels challenging. You will have days when your legs feel like cement, days when you struggle to hit your target RPM, and days when you feel like skipping the cool down. That is perfectly normal. The difference between those who succeed and those who quit is not perfect effort; it is unwavering consistency.
Every time you clip in (or strap in), adjust your seat, turn up the fan, and dedicate yourself to one of these indoor cycling workouts for beginners, you are doing something wonderful for your physical and mental health. You are building not just stronger legs, but stronger habits, a stronger heart, and a stronger mind.
So, go ahead. Adjust that saddle, put on some great music, and start with Week 1. This journey is yours, and we are excited for you to discover the incredible athlete within. You have all the tools now. Let us ride.
If you enjoyed reading this article, explore cycling stretches for beginners to learn more.