Today, let’s learn how to measure and adjust your bike saddle height for ultimate comfort and performance. I’m here to share some easy tips that can make a big difference in how comfy and smooth your cycling adventure feels.
It doesn’t matter if you’re a weekend rider or a pro; getting your saddle height just right can make your cycling experience way better.
Imagine riding your bike smoothly, feeling super comfy with every pedal. That’s what we want, and today we’ll learn how to measure and adjust your saddle height like a pro.
So, grab your bike, let’s go, and find out how to do it!
Importance of Saddle Adjustment in Cycling

Now, before we get into the details of adjusting your saddle, let’s talk about why it’s so important for cycling.
Unlocking Comfort:
Getting your bike saddle height right isn’t just about avoiding discomfort; it’s about making your ride super comfy. Think of your saddle as the spot where your body connects with your bike.
When it’s set up well, it makes your ride smooth and lets you enjoy longer trips without feeling uncomfortable.
Pedal Power:
Imagine every time you push your pedals, you go forward super smoothly. That’s what a good saddle height does. It helps your pedals work better, turning each push into more power, speed, and a ride that feels really nice.
It doesn’t matter if you’re going uphill or on a flat road; the right saddle height can make your cycling much better.
Pro Tips:
Ever wondered why pro cyclists seem to ride so effortlessly? It’s not just because of their cool gear; it’s also because they pay close attention to details like adjusting their saddle.
They know that having the right saddle height is like having a secret weapon – it gives them an edge. And the good news is, you can use their tricks too and ride like a pro!
So, as we go through how to measure and adjust your saddle height, remember it’s not just a technical thing.
It’s like a key to make your cycling more fun and easy. Stick around as we go through the steps to get that perfect saddle height – your ticket to a great cycling experience!
Measuring Bike Saddle Height

Using Traditional Methods
1. The Heel Method
When it comes to measuring your bike saddle height, the heel method is a simple trick that anyone can use. Here’s how it goes:
- Get on Your Bike:
- Stand next to your bike and swing your leg over the saddle.
- Place Your Heel on the Pedal:
- While sitting on the saddle, place your heel on the pedal.
- Check Your Leg Extension:
- Make sure your leg is fully stretched, and your heel is touching the pedal.
- Adjust the Saddle:
- If your leg is not fully extended, adjust the saddle height until your heel comfortably reaches the pedal with a straight leg.
Remember, the goal is to have a slight bend in your knee when your foot is on the pedal. It’s a quick and easy way to set your saddle height for a comfortable ride.
2. Smartphone Camera Measurement
If you have a smartphone, you’re in luck! You can use it to measure your saddle height. Here’s how:
- Get a Friend to Help:
- Ask a friend to take a photo or video of you while you’re on your bike.
- Review the Foot Position:
- Look at the photo or video and check the position of your foot on the pedal.
- Check for a Slight Bend:
- Ensure there’s a slight bend in your knee when your foot is on the pedal. If not, adjust the saddle height accordingly.
Using your smartphone is a handy way to visually check your saddle height and make adjustments as needed.
3. Formula-Based Measurement
If you like a bit of math, you can use a simple formula to estimate your saddle height. Here’s how:
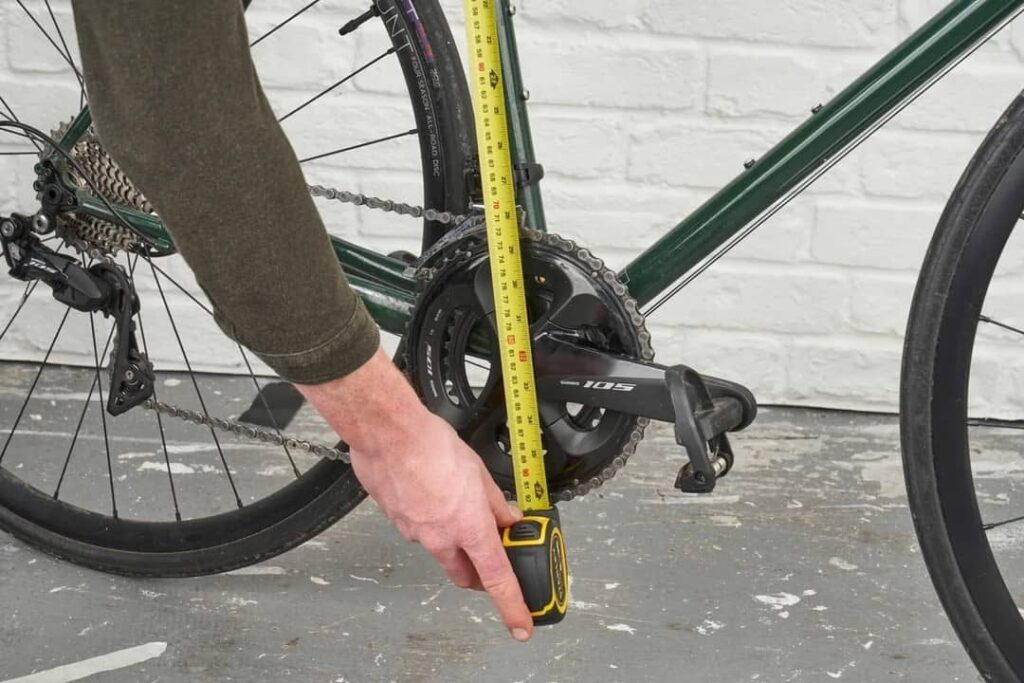
- Measure Your Inseam:
- Measure the length from the ground to your crotch.
- Multiply by 0.883:
- Multiply your inseam measurement by 0.883. This gives you an approximate saddle height.
- Adjust as Needed:
- Sit on your bike and adjust the saddle to match the calculated height. Fine-tune until you find a comfortable position.
This formula provides a baseline for your saddle height, and you can make small adjustments based on your comfort and riding preferences.
Measuring your bike saddle height doesn’t have to be complicated. Try these traditional methods, and find the one that works best for you!
Alternative Measurement Techniques
1. LeMond Method
The LeMond Method is another straightforward way to measure your bike saddle height. Here’s how you can do it:
- Get on Your Bike:
- Swing your leg over the saddle and sit comfortably.
- Position the Pedal at 6 O’clock:
- Place one pedal at the 6 o’clock position (lowest point) using your dominant foot.
- Check Your Knee Bend:
- Your knee should have a slight bend when your foot is on the pedal. Adjust the saddle height until it feels just right.
- Repeat for Both Legs:
- Perform the same steps with your other foot to ensure a balanced and comfortable riding position.
The LeMond Method provides a practical approach for setting your saddle height and ensuring a comfortable ride.
2. Hamley Method
The Hamley Method is a simple technique that anyone can use to find the right saddle height. Here’s a step-by-step guide:
- Initial Adjustment:
- Set your saddle height approximately at hip level.
- Ride and Observe:
- Take a short ride and pay attention to how your knees feel during the pedal stroke.
- Adjust Based on Comfort:
- If your knees feel strained, adjust the saddle height slightly. Keep testing until you find a height that feels comfortable.
- Fine-Tune as Needed:
- Make small adjustments until your knees are happy, and you’re pedaling smoothly.
The Hamley Method relies on your comfort while riding to guide the saddle height adjustment.
3. Holmes Method
The Holmes Method is a user-friendly technique for setting your bike saddle height. Follow these simple steps:
- Get Your Saddle Level:
- Ensure your saddle is parallel to the ground.
- Adjust Saddle Height:
- Set your saddle height so that your knee has a slight bend when the pedal is at the lowest point.
- Test and Refine:
- Take a short ride and assess how your knees feel. Make further adjustments if needed for optimal comfort.
The Holmes Method prioritizes a level saddle and a comfortable knee position during your ride.
Trying out these alternative methods gives you options to find the one that suits you best. Remember, the goal is a comfy ride, so go ahead and experiment until you find your sweet spot!
Precision in Saddle Positioning
Fore/Aft Position Measurement
Now, let’s talk about making sure your bike saddle is in just the right spot.
- Initial Adjustment
- Knees Over Pedals
- Adjust as Needed
- Test Your Ride
Start by setting it flat, so it’s even with the ground.
When you pedal, your knees should be right over the pedals, not too forward or too back.
If they’re not quite there, move your saddle a bit until your knees feel just right.
Take a short ride to test it out – if your knees are happy, you’ve got the fore/aft position sorted.
Tackling Saddle Tilt
- Level Your Saddle
- Comfortable Angle
- Adjust Gradually
- Fine-Tune During Your Ride
Saddle tilt is about finding a comfy angle for your pelvis. Begin by making sure your saddle is level with the ground.
While riding, pay attention to how your pelvis feels. You want a tilt that doesn’t cause any discomfort.
Make small adjustments until you find that perfect angle.
Take your bike for a spin and see how it feels – if your pelvis is happy, you’ve nailed the saddle tilt. It’s all about finding what feels just right for you.
Perfecting Your Bike Saddle Height
Combining Methods for Accuracy
When it comes to getting your bike saddle height just right, combining a few methods can be super helpful.
Try out the heel method – it’s as easy as putting your heel on the pedal to check your saddle height.
Don’t forget the smartphone trick – get a friend to take a photo or video of you on your bike and check how your foot sits on the pedal.
If you like a bit of math, use the formula method – measure your inseam and multiply it by 0.883 for a baseline saddle height.
Factors Influencing Saddle Height
Now, let’s talk about the things that can affect your saddle height. Your bike fitting matters – it’s like finding the perfect match between you and your bike.
Consider your seat post and its role in getting your saddle height spot on. Also, think about ergonomics – it’s about making your bike fit you, not the other way around.
These factors, along with the methods you’ve learned, will help you dial in the perfect saddle height for a ride that feels just right.
Verifying Saddle Height Accuracy
Signs of Correct Saddle Height
So, how do you know if your saddle height is just right? Well, here are some things to look out for. When your saddle is spot on, your knees will be slightly bent when your foot is on the pedal.
You’ll feel comfy, not like you’re reaching or straining. It’s like finding the Goldilocks zone – not too high, not too low, just right.
| Signs of Correct Saddle Height | Description |
|---|---|
| Slight bend in the knee when pedaling | A comfortable knee position that avoids overextension or strain |
| Comfortable pedaling without reaching | The ability to pedal smoothly without feeling like you’re reaching too far or straining |
| Balanced feel during the ride | A sensation of balance on the bike, not tilted too forward or backward |
| No discomfort or pain | Riding without experiencing discomfort or pain in the knees, hips, or lower back |
Assessing Accuracy
Now, let’s talk about checking if your saddle height is accurate. Take your bike for a spin, and pay attention to how your knees feel. If they’re happy, and you’re pedaling smoothly without any discomfort, you’ve nailed it.
If something feels off, make small adjustments until it feels just right. Remember, it’s all about finding that sweet spot that makes your ride enjoyable.
| Scenario | Recommended Action |
|---|---|
| Knee pain during or after the ride | Check and adjust saddle height to ensure knees are not overextended |
| Feeling like you’re reaching too far | Lower the saddle slightly to achieve a more comfortable reach |
| Discomfort in the lower back | Check saddle tilt and make small adjustments to find a comfortable angle |
| Uneven pressure on the saddle | Experiment with saddle tilt and fore/aft position for a more balanced feel |
FAQs
How do I measure my bike saddle height using the heel method?
Sit on your bike, place your heel on the pedal, and adjust the saddle until your leg is straight with a slight bend in the knee.
Can I use the smartphone method alone to set my saddle height?
Yes, ask a friend to take a photo of you on the bike, and review to ensure your foot position on the pedal allows for a slight knee bend.
What’s the significance of saddle tilt in cycling?
Saddle tilt influences pelvic comfort; ensure its level initially and make minor adjustments for the most comfortable riding angle.
How often should I reassess my saddle height?
Regularly check your saddle height, especially if you experience discomfort or change your riding style, to maintain optimal comfort and efficiency.
Is there a universal formula for determining saddle height?
While a formula can provide a baseline, individual comfort and preference play a crucial role; it’s best to fine-tune based on your riding experience.
Conclusion
So, there you have it – the journey to finding the perfect bike saddle height. It’s not about complicated formulas or fancy gadgets; it’s about how you feel on your bike.
Pay attention to your knees, listen to your body, and make those tiny tweaks until everything feels just right.
Now, armed with the knowledge of different methods and factors influencing saddle height, go ahead and enjoy your ride with the confidence of knowing your saddle is set up for a fantastic cycling experience!
